I am NO pro to knitting whatsoever! I just began knitting about 2 or 3 months ago!! But after so many scarfs...and dish towels...I have to say, I was wanting something more. lol But there really isn't much for us beginners. You go from simple to... PUT THOSE BIG GIRL PANTIES ON! hahaha And well...I'm just not ready for the big girl stuff. So, I came up with something I CAN do after playing with my yarn and what I do know. SO! Here is my tiny tutorial on a Knit Bow and Bow Tie. :)
Now, I have made these for both my children and I had an adult ask for me to make a bow tie for him this way as well. These instructions are for the larger of the two, but I will also share how to adjust this for the kiddo's.
Items Needed:
I used a very cheap brand of acrylic yarn for mine.
Along with the size needle suggested for it, so an 8 or 10.
Here is the pattern:
You will start by casting on 20 stitches this is for the longer bow, the blue bow being made hree. (More for an adult bow.) Or do 13-15 cast on for the yellow bow, kids bow.
Then you will cable stitch twenty-twenty five rows.
(This depends on the yarn used, and how thick you want your bow to appear.)
Then Cast Off.
Once you have cast off you should be left with a rectangle that looks like this...

So, for everyone trying this out, you should have it laying in front of you horizontally. Cut your strings shorter and weave them in...

Next pinch in the center your bows shape. I place a finger in the center as I press the sides in so I can get a cute little pleat in the center.

Then while trying to keep the shape, I grab a new piece of yarn that has NOT been cut from the skein and I wrap and tie a tight knot around the center on my bow. After doing this, I begin to wrap my yarn AROUND the center going out slightly wider to make the cute little center knot. I do this until I am satisfied with the width and shape of it. While wrapping be sure to NOT wrap the other end of the string (that is NOT attached to the skein) in the center. You will need it to tie off and knot the yarn on.

Then I bring BOTH strands that I started with together in the back of the bow and I knot these together tightly. Ta DA! We have a bow. If this is all you were desiring for then hot glue your alligator clip on it and your done. If your wanting to take it the step further and make it a bow tie....
Set aside your bow, DO NOT TRIM YOUR STRINGS AT THE BACK OF THE BOW (you will need these later to attach to the collar piece),and grab that yarn and needles again...
This time you will need to look at whoever it is you are making this little tie for, and as you cast on your stitches, know that length of your cast, needs to be enough to go around their neck.
I say 40-55 casts for little guys and 60+ for adults.
This does NOT have to be spot on because this will be finished with a Velcro closure giving it some leeway.
Once you have cast these on, garter stitch 5 rows, and cast off (for kids bow tie), or garter stitch 6, and then cast off. I find these are the best widths to fit under the collars of a dress shirt. Once you are finished it should look like this...

Now find the center of your neck piece here (fold it in half), take your bow and the long strings in the back of it and you will weave your string through a hole in the neck piece, near the center...it should look like this once you have done it...

Now tie it off, by knotting it, for more security, I suggest cutting an extra piece of yarn, and at the back of you bow feed the yarn under the center bow knot, and then weave it through the neck piece like you just did here and knot it off. Just makes the bow not so floppy, and hold tighter....its looking like a bow tie... now to finish it up.
Cut two piece of Velcro, one the ridged, and one the soft side. You will want it about 2 or 3 inch's long. Then I just sewed them on using my machine. Be sure to place one piece of the velcro on the OUTSIDE of the neck piece and one on the inside, or it will not close smoothly.

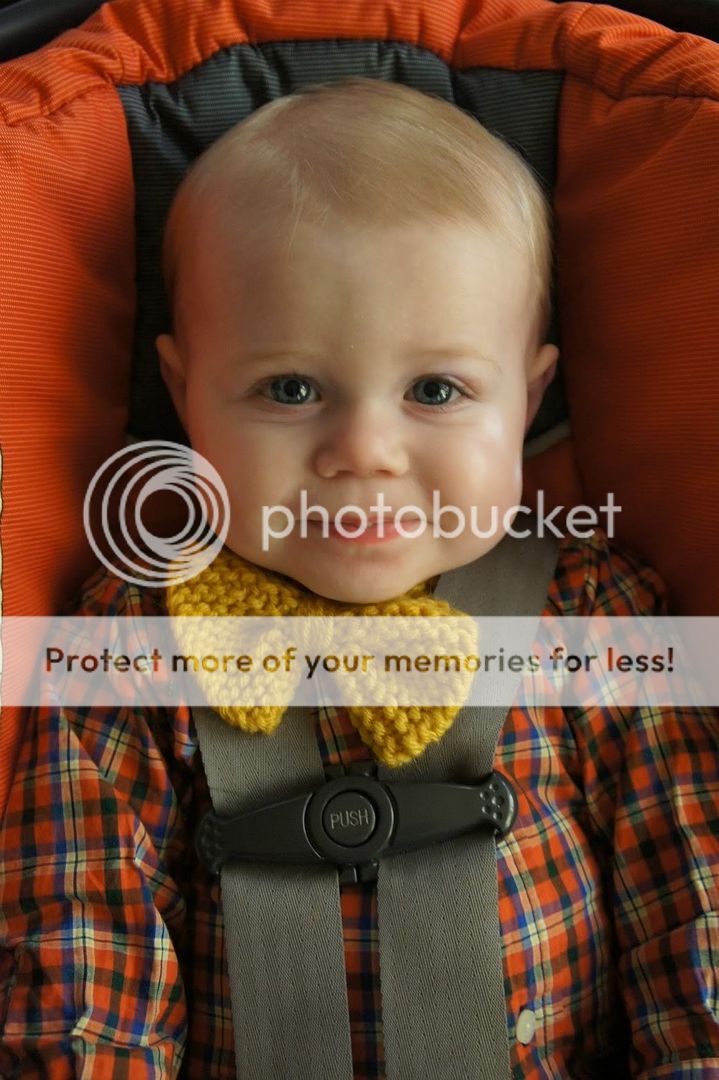
You now have a bow tie!!! Check it out!!

Here is it on my little man....

Don't be afraid to ask questions, and really make it your own as well! I made the blue bow here longer, I prefer the stubby-ness to the little yellow bow though. It's just more of my style but play around with it. I would LOVE to see what you come up with!
oh my goodness, this bow tie is adorable! I love it, and those chubby little cheeks - just fantastic! I love babies, they always look like little old men - HA!
ReplyDeleteHahaha! I couldn't agree more!!! But I'm so very biased!! LOL
ReplyDeleteI love this! Deliciously cute! I don't know how I could possibly manage another hobby, but I'm dying to learn to knit.
ReplyDeleteThanks for visiting my blog. I've enjoyed looking through yours, and I look forward to more of your sewing adventures. Try knits! They're fun! By the way, I think I read that Made By Rae will have a sewing with knits series in January. Be sure to check it out!
Thanks so much for popping over and visiting me in return!!! Means a lot!
ReplyDeleteKnitting is much "easier" than I thought it would be...and addictive! hahaha Thank goodness for me it will be a "seasonal" hobby! lol
I will have to go stalk Made by Rae and watch for that! hahaha I need all the help I can get when it comes to sewing on knit!! I should have some new tutorials coming up very soon...:)